Raspberry Pie with a Citrus Twist

Raspberry Pie with a Citrus Twist

Ingredients

1 crusty pastry dough
600 grams of frozen raspberries
Zest of one lemon
Seeds of one vanilla pod
2 table-spoons of sugar
3 tablespoons of brown sugar
ca. 1 tablespoon of powdered sugar
ca. 1 tablespoon of corn starch

Making Raspberry Pie

Put the oven onto 220 degrees Celsius and leave a baking tray on the bottom shelf.  Now, I have already posted my apple pie recipe and that is where you will find the description on how to make the crust. Follow the link and prepare the dough, and return to this post when your dough is ready-made. I have found that you do not have to keep the dough in the fridge to make it easier to handle. After I had made the two balls I rolled out one for the pie form and the other for the lid.  I used a 25 centimeter in diameter pie tin and rolled out the dough pieces accordingly.

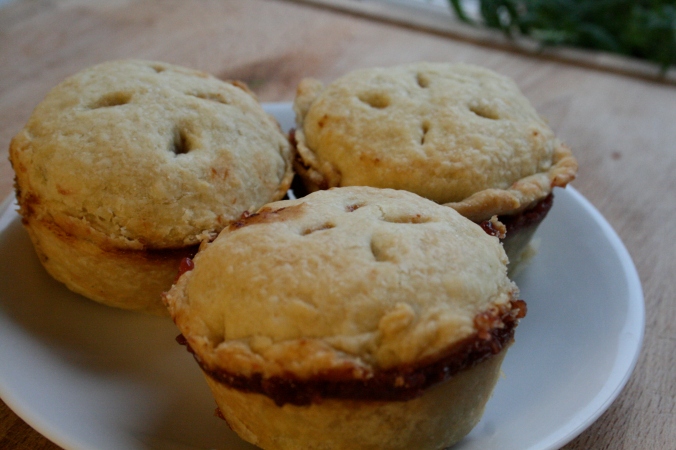
Now for the filling. You’ll notice that I did not use a lot of sugar in the filling and I also didn’t pre-cook it as I wanted the raspberries to keep as much shape as possible. I basically just mixed all the ingredients and let it cook together in the oven. I found that the amount of starch was perfect as the filling was not too loose or too firm. I would recommend giving it a taste making it taste as sweet as your taste buds tell you. You can also pre-cook the filling to be sure that the berries have the sweetness you are after. Mine still had a sour zing to it :).  However you chose to do it, continue by adding the filling to the bottom pie crust, laying the other layer of dough on top. Press the edges that go over the tin down into the other dough edges forming a crust. I used a fork to create a pattern around the edges, pressing the fork down on the edges. The result visible in the picture above.

Take out a sharp knife and make 4 cuts 2 centimeters from the middle, like a cross evenly spaced leaving space in the middle.  Bake the pie on the bottom shelf for 30 minutes. Cover the edges of the pie with aluminum foil and leave in for another 15-20 minutes. The pie is ready when the liquid begins to boil up in the slits or over the edges. (I recommend having a piece of baking paper underneath the pie, so that none of the liquid finds it way to the floor of your oven).

Take the pie out of the oven and leave it to set.

Enjoy with a scoop of vanilla ice, hot or cold, this is delicious!

Mini Macaroon Fruit Pies

Mini Macaroon Fruit Pies

Ingredients

Crunchy Pie Crust
4 apples
ca. 1 teaspoon of cinnamon
ca. 100 grams of almonds
1 handful of gløgg mix (mix of split almonds & raisins)
1 glass of pitted dessert cherries (370 grams )
1 deciliter of sugar
Juice of 1/2 lime
1 teaspoon of Maizenna (corn flour)
4 teaspoons of brown sugar

Making Mini Macaroon Fruit Pies

Ok, so technically this is not a recipe for macaroons, but seeing as we were a bit cheap on the dough, the top did not connect to the bottom, and voila what you get is a macaroon shape, and room for cream or ice cream under the lid I might add.

Before you start on the filling I recommend you have a go at the pie crust, following the instructions on the link above. The pie crust needs to chill for at least one hour in the fridge so having it out-of-the-way and in the fridge before you begin on the filling is a good thing. Right, you need to get your ingredient on your counter. Start with the almonds as they need to be finely ground.

Now move along to the apples, peel them, cut out the stalk and chop them into cubes. Add the cubed apples, the grated almonds, cinnamon, cherries with juice, gløggmix, lime juice and regular sugar to a pot. Let warm up and come to the boil, stirring, to make sure it does not burn. Gløggmix is a mixture of split almonds and raisins, very popular in scandinavia. When the apples are tender, take the pan of the heat and sift the mix through a strainer. Leave the mix in the strainer and put the juices back on the pot with maizenna and some brown sugar (taste the sauce before, if it’s too sweet leave the sugar out). Let the sauce thicken, before taking it back of the pot, add the strained fruit back in the pan, mixing well.

Preheat the oven to 225 degrees celsius. Take out a big muffin tray and one of the pie doughs from the fridge. Put some flour on your baking surface and start rolling out your dough, not too thin, we don’t want it breaking. There should be enough dough to make circles for all 12 macaroon pies. Use a big cup to make the circles, try one out to see if the circle is big enough to cover the bottom and the edges when it is flattened. If you want the macaroon look you use the same size for the lid. Scoop fruit mix into the dough fold and take out the dough for the lid. Same process as before unless you want it to connect all the way. I tidied the edges of the bottom and top lid together, and then I made 4 slits in the lid, as seen on the picture above, of course these slits closed, there of the pressure that separated the lid from the bottom, so alternatively you can also do it the way it is shown in this recipe.

Place the tray in the middle of your preheated oven and turn it down to a 180 degrees celsius. Leave to bake for 20-30 minutes, until the pies turn a golden brown. When the pies are golden take the muffin tray out and put it on a grid. Leave to set until cool. Use a sharp knife to cut along the edges and a fork to tip it out carefully.  As with the apple pie these little pies also keep for three days in room temperature. I kept them in one of my pretty metal boxes to be sure.

The Ultimate Crusty Apple Pie

The Ultimate Crusty Apple Pie

Ingredients

Crunchy Pie Crust
350 grams of plain flour
1 teaspoon of salt
30 grams of sugar
226 grams of butter  (cold)
0,5 deciliter ice water

Apple filling
About 850 grams of apple slices
50 grams of sugar
55 grams of brown sugar
2 tablespoons of lemon juice
1 teaspoon of cinnamon
1/4 teaspoon of salt
28 grams of butter
15 grams of Corn flour

Making the Ultimate Crusty Apple Pie

Before I begin the explanation there is one thing need mentioning. Butter dough needs to go fast and the instructions really should be followed to the letter to get the best result possible. If you are lucky enough to have a food processor this is an easy treat, I don’t so manual labour it was.

Preparing for the dough you need to keep the butter in the fridge, pour a glass of water and add some ice cubes (also keep in the fridge). Measure up your flour, salt and sugar and mix it well in a bowl. Take out the butter and measure it up quickly. Cut the butter into small cubes and add to the flour mix. Crumble the mass with your fingers until the consistency likens coarse sand. Take out your ice water and measure it out, add a little at a time with one hand while using the other to start shaping the dough. Use just enough hand power to gather it all together.When the dough is one piece cut it in half, roll the halves into balls, flatten them, and wrap them in cling foil. In the fridge they go for at least one hour.

Tip: If you think this takes to long you can always make the dough the day before and just leave it out a bit longer when you want to handle it. I had the dough in the fridge for about 3 hours and only needed to warm it slightly with my hands before I could start using the rolling-pin.

Peel and cut the apples into boat-like slices and lay them aside. In a big bowl gather together the rest ingredients, soft butter this time and mix it well, add the apples and make sure the slices are all covered. Leave the apples for 30-45 minutes so that the lemon juice and sugar can help drain some liquid out of the apples.

While your apples are draining the hour should be up, and you can get back to making the crust. Put the oven onto 220 degrees Celsius and leave a baking tray on the bottom shelf. I used a 25 centimeter in diameter pie tin and rolled out one of the dough pieces accordingly (keep the other one in the fridge). Remember to use a well flowered surface, putting flour under the dough so as not to have it sticking to the surface or your rolling-pin. Try to get the dough as even as possible and lift it carefully into the pie tin, flatten it into the tin, keeping your hands light so as not to puncture the dough. Cut the excess dough around the edges. Put cling film on the pie tin again and put it back in the fridge. Don’t let the excess dough go to waste instead you can roll it out again making it into leaves or other decoration, refrigerate this as well. Take out the second dough and make it into a round like the first one, add it onto a baking paper and cover it in cling foil, in the fridge it goes.

Now that the apples have been left to lose some of their liquid  add them to a sift and add the juice into a saucepan. Put the pan over the heat and let the juice simmer until it becomes thicker and caramel like. Add the caramel to the apples, mixing well. Make sure the oven has preheated, take out the pie tin and add the apple caramel syrup mix.

Retrieve the pie lid from the fridge and fold it over the apples carefully, trying not to puncture it. It is important you take it from the fridge first when you need it as it is easier to handle. Press the edges that go over the tin down into the other dough edges forming a crust. Take out the rest dough that you have shaped into leaves or other decoration and place them lightly but firmly around the rim.  Take out a sharp knife and make 4 cuts 2 centimeters from the middle, like a cross evenly spaced leaving space in the middle (so as not to crack open I believe).

Bake the pie on the bottom shelf for 30 minutes. Cover the edges of the pie with aluminum foil and leave in for another 15-20 minutes. The pie is ready when the liquid begins to boil up in the slits or over the edges. (I recommend having a piece of baking paper underneath the pie, so that none of the liquid finds it way to the floor of your oven).

Take the pie out of the oven and leave it to set. I left it over night and served it next day as a work lunch treat. Tasted brilliantly cold, but I would say it would be just as good slightly warmed and served with a scoop of vanilla ice cream. I read somewhere that apple pie can be kept for 2-3 days in room-temperature, but the question is will it last that long :)

Good luck!

p.s. I have always wanted to make a pie since I saw Disney’s Snow White on VHS :)

Homemade Rhubarb Crumble

Homemade Rhubarb Crumble pie

Ingredients

Homemade crumble
100 grams of brown sugar
100 grams of  butter
100 grams of plain flour
160 grams of oats
50 grams of milk
pinch of salt

Rhubarb filling
About 300-500 grams of rhubarb
2 tablespoons of sugar
2 deciliters of water

Vanilla syrup
100 grams of raw-cane sugar
50 grams of brown sugar
1 deciliter of water
1 cinnamon stick
1 vanilla pod

Making Homemade Rhubarb Crumble

We’ll start with making the crumble dough. Add the sugar and butter to a pan and cook together until the sugar dissolves. Let i cool for 5 minutes before you stir it into an emulsified caramel. Mix the caramel with the rest of the ingredients, first with a paddle spoon, then with your hands.

Remove the top and bottom parts of the rhubarb, as they might look less delicate. Cut them in 2 centimetre long pieces, and add them with sugar to a pot of boiling water.

Let them cook until tender, less than 5 minutes more than 2 minutes would be my guess. If your unsure take one out and see.

Drain the rhubarb and lay it to the side. Spread 2/3 of the crumble dough into a ovenproof dish or a pie tin. Lay the drained rhubarb on top. Now it’s time to start on the syrup.

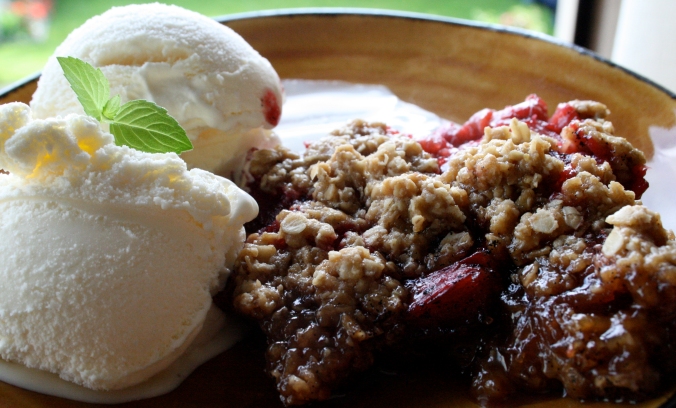
Cut the vanilla pod  length-wise and scrape the seeds out. Add the pod and the seeds as well as the rest of the ingredients to a pot. Let the ingredients boil up, turn of the heat and leave the syrup to stand and infuse for 15 minutes. Sieve the syrup and cover over the rhubarb and crumble dough. Finish with the last 1/3 of the crumble dough and bake in the oven for 25-30 minutes at a 190 degrees Celsius until the pie turns caramel brown in colour.

Enjoy with a scoop of vanilla ice cream
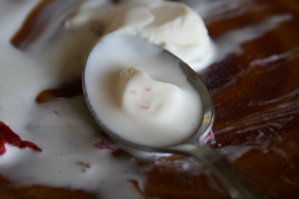
The pie is so good it brings out a smile in the ice cream.

This pie is so good it even brings out a smile in the ice cream.

Tip:  The syrup is very sweet so remember that if you want to change out rhubarb with apples or other fruit, make sure that it is the sour kind, if not it might be a good idea to reduce the amount of syrup or sugar in the syrup.

INSPIRED BY BJARNI